
Create Bootable USB Drive

   Step 1: Create Bootable USB Drive
  1. Start PowerISO (v6.5 or newer version, download here).
  2. Insert the USB drive you intend to boot from.
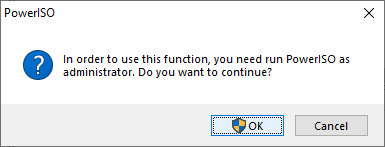
  3. Choose the menu "Tools > Create Bootable USB Drive". The "Create Bootable USB Drive" dialog will popup. If you are using Windows Vista or above operating system, you need confirm the UAC dialog to continue.


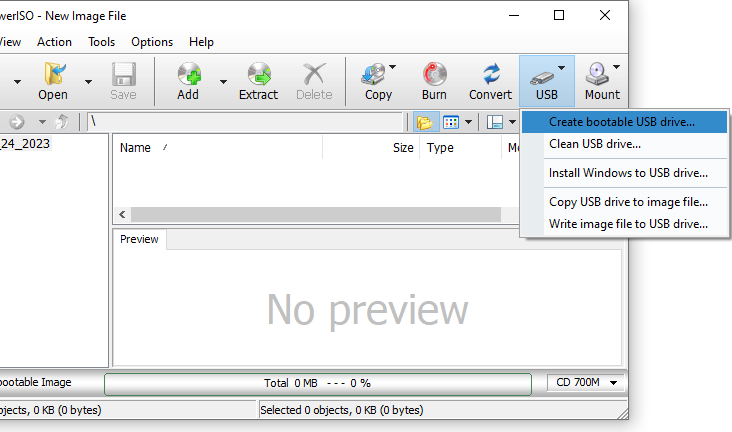
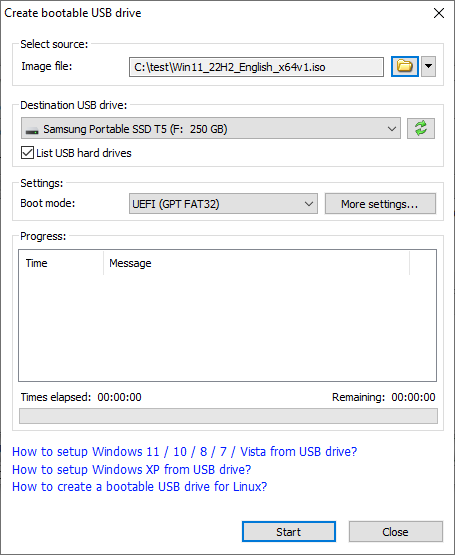
  4. In "Create Bootable USB Drive" dialog, click "..." button to open the iso file of Windows operating system.
  5. Select the correct USB drive from the "Destination USB Drive" list if multiple USB drives are connected to the computer.
  6. Choose the proper writing method. "USB-HDD" is recommended.
  7. Click "Start" button to start creating bootable USB drive.
  8. PowerISO will alert you that all data on USB drive will be destroyed. Click "OK" to continue.


    The program will start writing USB drive, and showing the progress information. You should get the message "Writing USB drive completed successfully." after the operation completes.


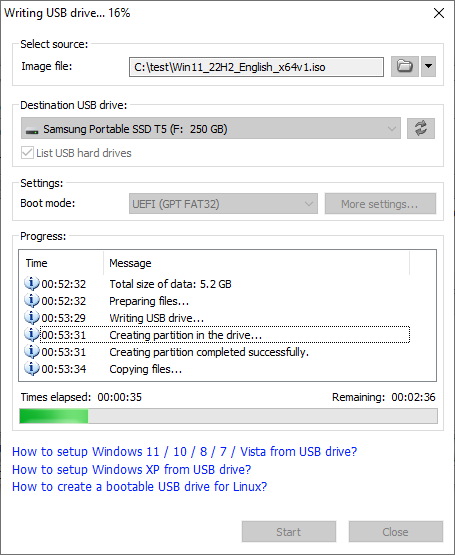
If no errors occurred in the above process, you should now be all set to setup Windows from USB drive!

Step 2: Configuring the BIOS
You should now reboot and go into the BIOS configuration to boot from USB. Instructions for doing so wildly from system to system, but generally entail the following:
  1. Reboot the system.
  2. While booting (before Windows starts loading), get into the BIOS configuration screen by hitting something like F1, F2, Delete or Escape. Hotkey instructions are generally provided on the screen.
  3. Go to the section that contains your boot devices.
  4. With your USB drive plugged in, the USB drive should be listed. If it isn’t, your system might not support booting from USB. Assuming that it is supported (as is the case with virtually all modern hardware), promote your USB drive to the primary boot device.
  5. Exit from the BIOS configuration, saving all changes.
Please notice that you can seriously screw up your system by providing incorrect BIOS settings!

Step 3: Booting and setup windows from USB drive
Assuming that you properly configured your BIOS and your USB drive supports booting,  Windows setup should now load. Depending on the speed of your USB drive, this may take a while.
If it isn’t working, then double-check the following before making a scene:
  • Is your BIOS properly configured for booting from the USB device? (Is the USB device listed and does it have top priority?)
  • Have you correctly prepared the USB drive in step one? (Restart the procedure.)
  • Does your USB drive properly support being booted from? (Try another one!)

Comments

Popular posts from this blog

Spring Security with JWT for REST API

Spring is considered a trusted framework in the Java ecosystem and is widely used. It’s no longer valid to refer to Spring as a framework, as it’s more of an umbrella term that covers various frameworks. One of these frameworks is Spring Security , which is a powerful and customizable authentication and authorization framework. It is considered the de facto standard for securing Spring-based applications. Despite its popularity, I must admit that when it comes to single-page applications , it’s not simple and straightforward to configure. I suspect the reason is that it started more as an MVC application -oriented framework, where webpage rendering happens on the server-side and communication is session-based. If the back end is based on Java and Spring, it makes sense to use Spring Security for authentication/authorization and configure it for stateless communication. While there are a lot of articles explaining how this is done, for me, it was still frustrating to set it up for the f...

Java Functional Interfaces

  The term   Java functional interface   was introduced in Java 8. A   functional interface   in Java is an interface that contains only a single abstract (unimplemented) method. A functional interface can contain default and static methods which do have an implementation, in addition to the single unimplemented method. Here is a Java functional interface example: public interface MyFunctionalInterface { public void execute(); } The above counts as a functional interface in Java because it only contains a single method, and that method has no implementation. Normally a Java interface does not contain implementations of the methods it declares, but it can contain implementations in default methods, or in static methods. Below is another example of a Java functional interface, with implementations of some of the methods: public interface MyFunctionalInterface2{ public void execute(); public default void print(String text) { System.out.println(t...

Java Logger

In Java, logging is an important feature that helps developers to trace out the errors. Java is the programming language that comes with the logging approach. It provides a Logging API that was introduced in Java 1.4 version. It provides the ability to capture the log file. In this section, we are going to deep dive into the Java Logger API. Also, we will cover logging level, components, Logging handlers or appenders, logging formatters or layouts, Java Logger class, What is logging in Java? In Java, Logging is an API that provides the ability to trace out the errors of the applications. When an application generates the logging call, the Logger records the event in the LogRecord. After that, it sends to the corresponding handlers or appenders. Before sending it to the console or file, the appenders format that log record by using the formatter or layouts. Need for Logging It provides the complete tracing information of the application. It records the critical failure if any occur in ...